Instructions to sign
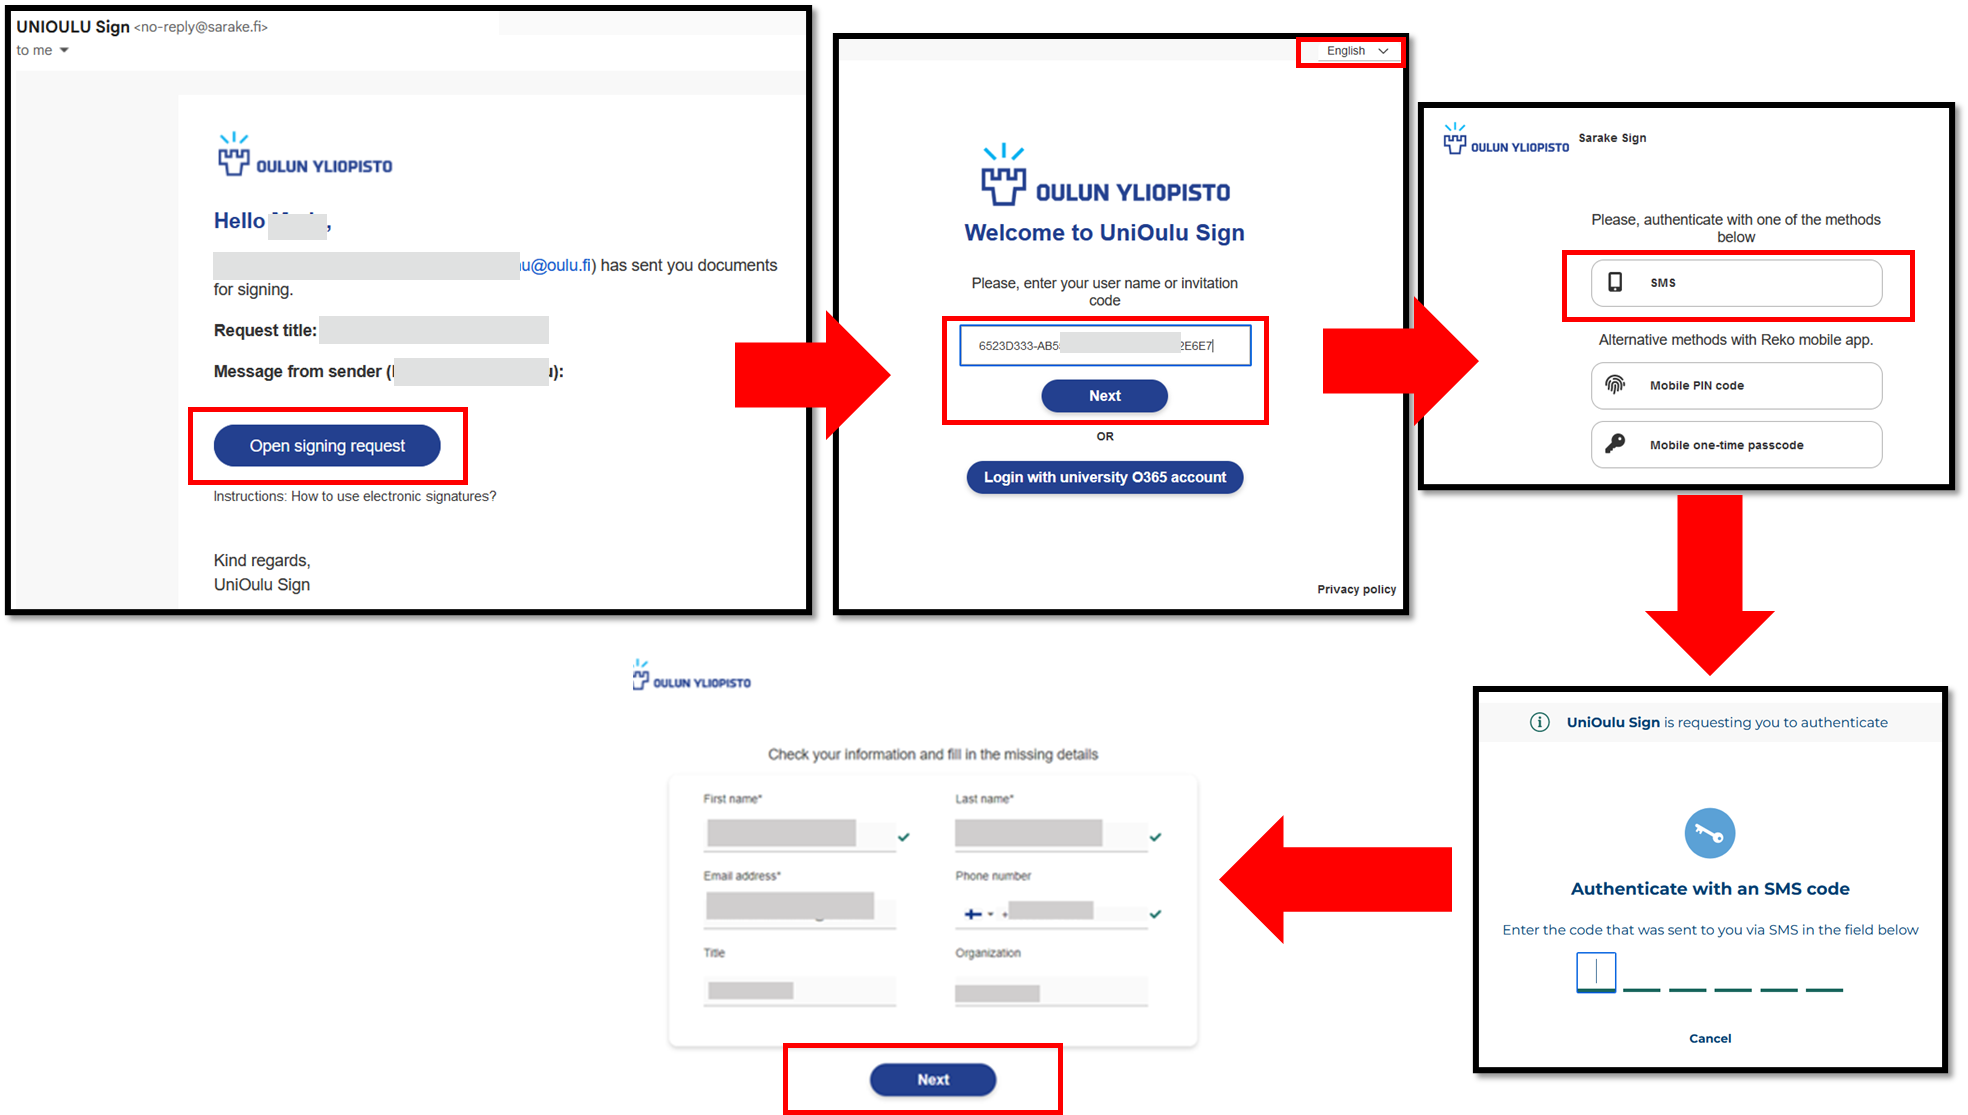
You receive the request to sign a document by email which contains a link to the UniOulu Sign. You log in to the service by utilizing O365 account (University staff and students) or with an invitation ID and PIN-code (SMS message).
- You receive a signing request by email.
- Choose ”Open signing request” -button in the message or following instructions at the bottom of the email: “How do I sign the documents?”.
- Service at https://sign.oulu.fi.
Log in with your university O365 account
- If you have received the request to your university user account email, use ”Login with university O365 account" on the login page.
- Use your university O365 acount for login.
- The form of username for staff is username@univ.yo.oulu.fi and for students username@student.oulu.fi.
- Add to the login windows the full username, including the part after @-sign.
- Please note that MFA (Multi-Factor Authentication) is deployed for almost all university user accounts, so additional authentication may be required when you log in, i.e. you verify your login with your mobile phone.
Log in with invitation code
People outside university organization receive an invitation code which is used for log in.
- Choose ”Open signing request” -button in the message.
- Invitation code will be copied automatically to the login section "Please, enter your user name or invitation code” (Figure 1.). If not, copy the invitation code from the email and paste it to the login section. If you copy the code, check that there are no empty spaces or extra characters in the field.
- You can also change the language (FI/EN) from the top-right corner.
- Choose "Next".
-
Choose the "SMS" button. You receive a one-time PIN code SMS to your phone, which is used as additional identification.
-
Add the number code to the number fields. If the number is correct, you will be automatically redirected to next screen (personal information).
-
Check that all your personal information is correct.
- Choose "Next". You will be redirected to the Sign service and to the signing request.

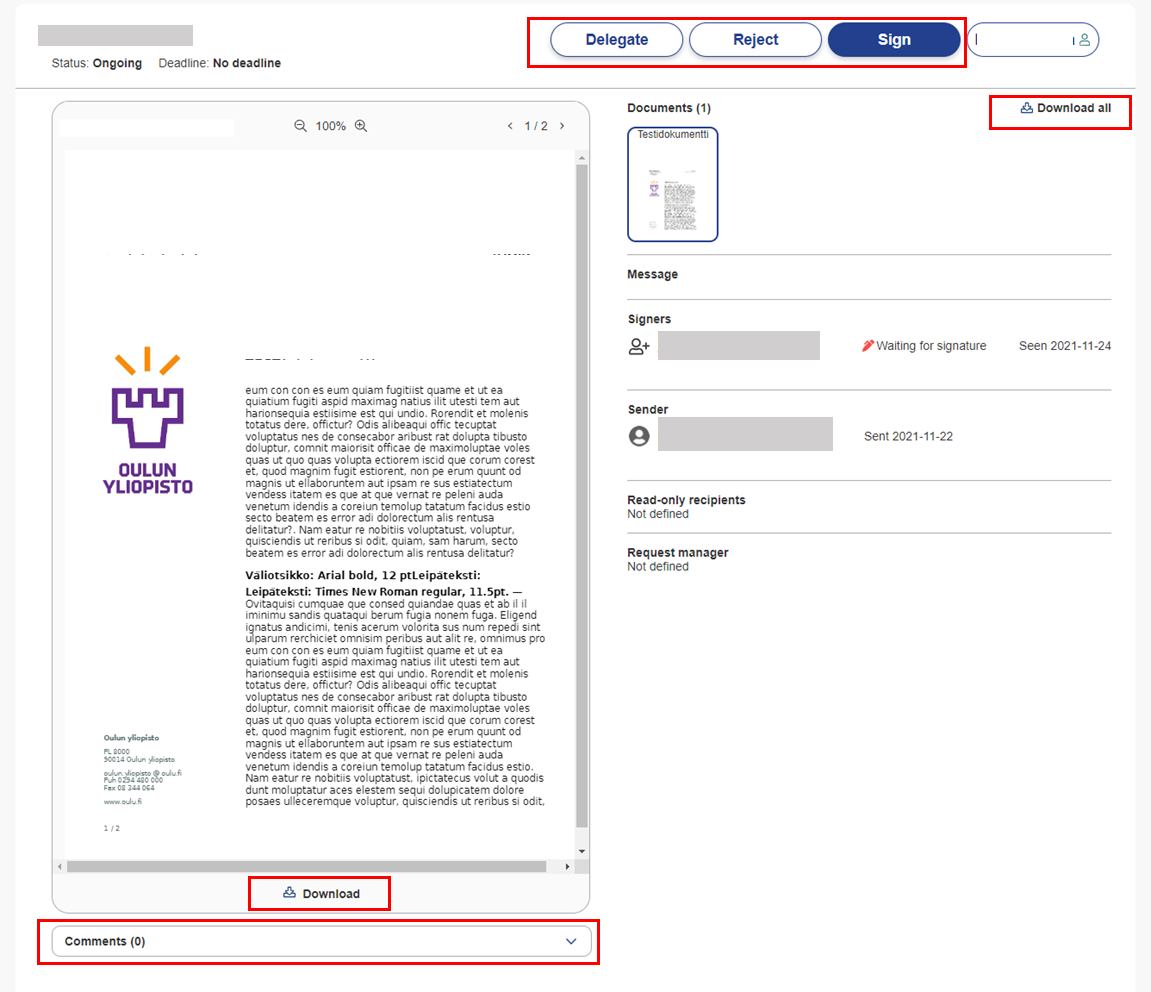
After logging in, you will be able to see the documents in the signing request, view, download and sign them.
Sign
- Check/read the document to be signed.
-
If necessary, you can leave a comment to the other participants under "Comments".
-
- Select ”Sign” at the top of the page (Figure 2.).
- The service asks for additional identification at this stage also. Select the SMS button and add the new number code on the screen to the fields.
- A new pop-up window will appear on the screen. Depending on how the request was prepared, you can see only the “Sign” button or you can first choose a signature style.
-
In case of several options, choose either a text signature, signature image or to draw your signature. After that, click “Next” and select “Sign”. If you select “Cancel”, you will return to the previous view, where you can change the signature style.
-
Reject or delegate
- If you do not want to sign, select ”Reject” from the top of the page .Before rejecting, you can leave a comment on the request at the bottom of the request page at section "Comments".
- You can delegate the request to someone else if necessary using the "Delegate"-button at the top of the page. You can use this function if someone else needs to sign a document instead of you.
When you sign, reject or delegate a request, the service sends an automated notification to the sender of the signature request.

- You will be notified by e-mail when the signing round is complete and you can retrieve the signed document(s) from the service for yourself.
- “Download all” -button will be found at the top-right and it packs the documents to a .zip -file before downloading them.
- You can also download single documents as a pdf by selecting them and choosing “Download” under the document preview section.
- Please notice, that signed documents are retained on the service only for 30 days.